Dreadnought is like Dodgeball
Fellow Pilots,
Happy Friday! I'm gearing up for a trip to London where my children will antagonize both tourists and "keep calm and carry on" locals. We're equal-opportunity like that. But before I hop aboard the National Express, today's post is about the U's early tactical assessments for Dreadnought, the newest map in War Robots.
The community manager at Pixonic told a group of content creators (YouTubers and writers like yours truly) that the most exciting ideas he's seen over the last several months come from their new map designer. I agree! If Moon, Valley, and Dreadnought are the shape of things to come, we know we're going to have very entertaining terrain on which to fight our battles.
A crashed space craft (perhaps a Star Wars-inspired Imperial Star Destroyer) is the distinguishing feature on Dreadnought. Just in case you thought War Robots fans were nerds with a lot of free time, you should see what's on the interwebs about Star Wars. Wow. Who knew the Star Destroyer has a crew of 37,000?!?!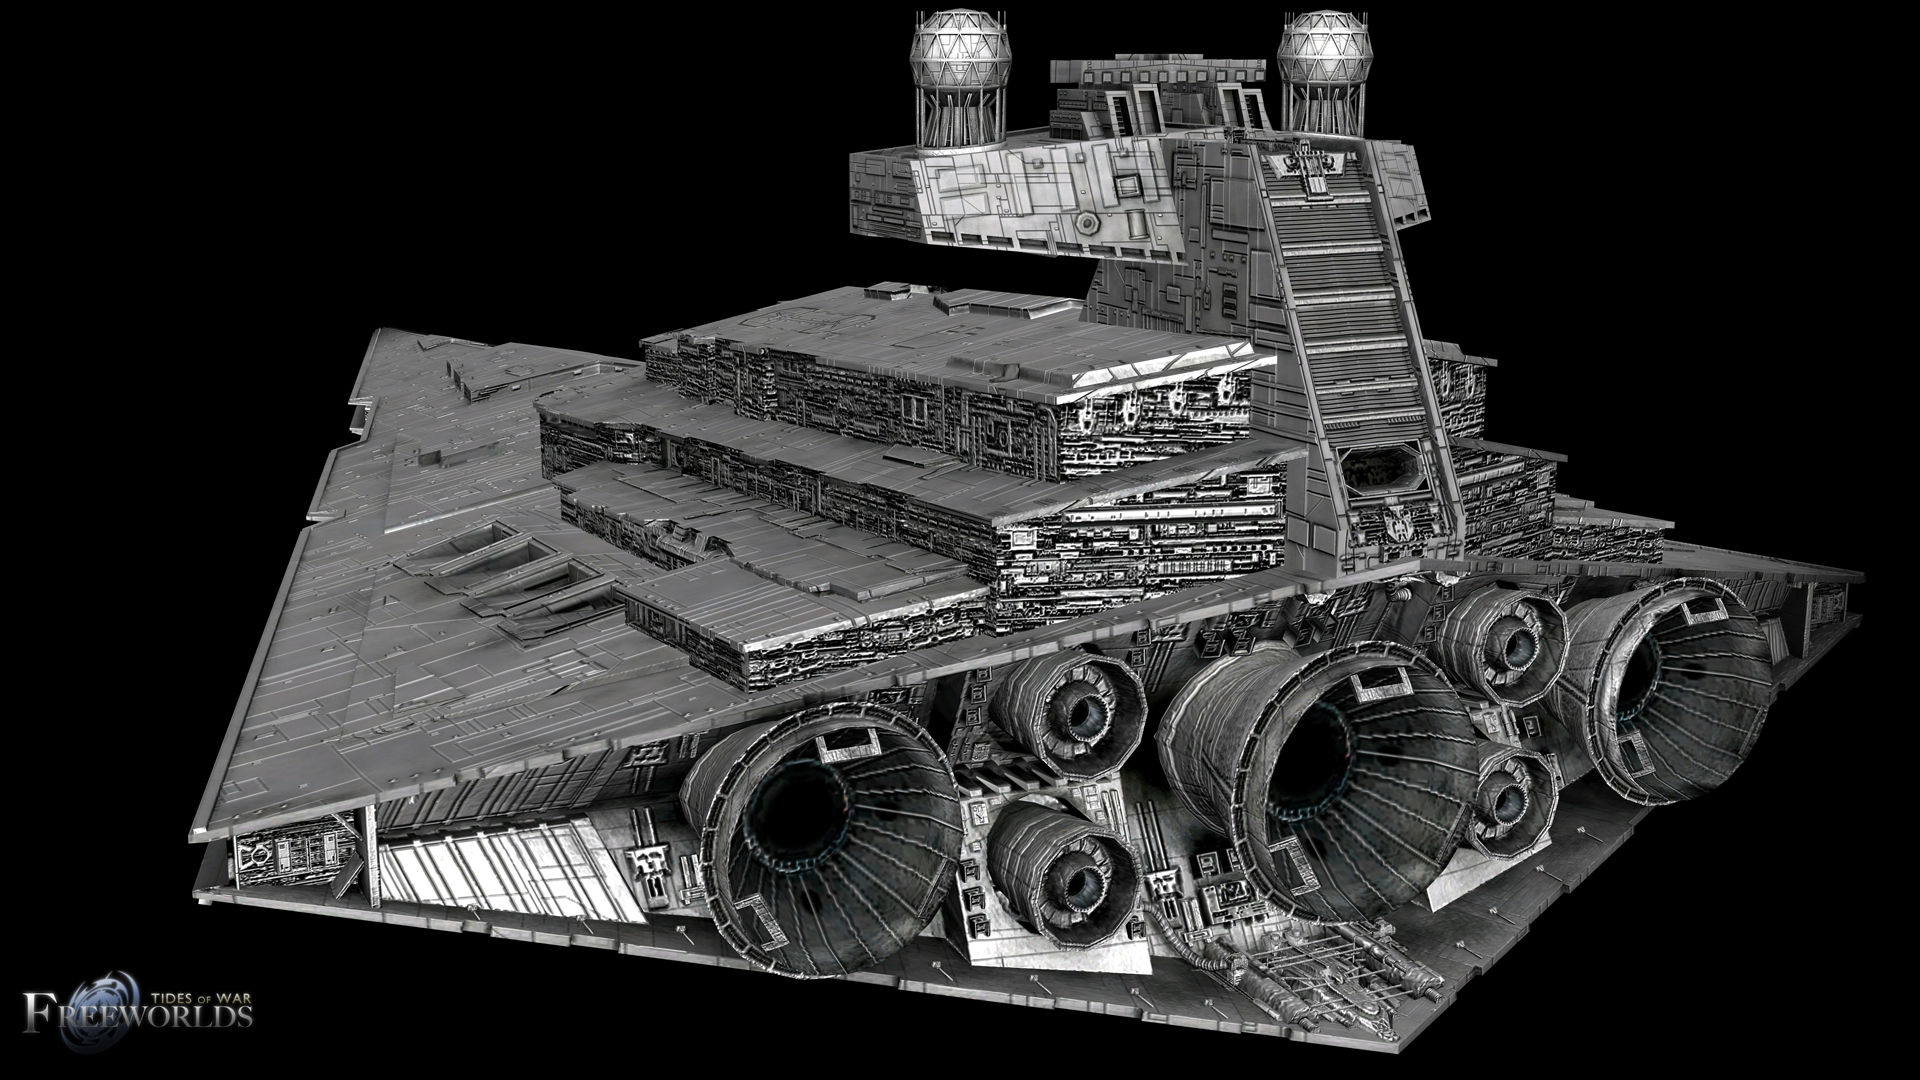
Because much of the ship is navigable on two levels, it’s a new feel for our game. While this battlefield is symmetrical, the beacons are laid out in a "T" instead of the more familiar "X" of Yamantau or Shenzhen. Each team has only one "home" beacon, with three laid out across the midfield line of the map. If you are a footballer (inexplicably, we call this game "soccer" in Canada's underpants), you will probably know what you need to do - when the defense is massed against you, move the action to the far side of the field.

Nothing has changed about our victory conditions - holding three beacons is how you win. We will assume your team is capable of holding its home beacon, because if they can't, there's no need to think about tactics. Dreadnought throws a curve at you, because it isn't usually possible to hold all three "centers." Instead, the magic is in besting your opponent on a constantly shifting seesaw.

It's also like dodge or "battle" ball, as it was called during my nerd-smiting days:

Let's look at the actual map:

Getting down to business, battles on Dreadnought are going to shift sides. A lot. So, we offer some helpful movement hints:
We recommend attacking along the high side of the craft, and then making your subsequent decisions based on your enemy's weakest position along the center line (BRAVO-CHARLIE-DELTA) - go there! In the video below, the pilot wanders all over the place. The center beacons change hands about a hundred times, and our hero doesn't worry about it. He does a lot of damage, which obviously helps, but he's more interested in HeyChee firepower than strategy related to the map. This battle takes all of the ten minutes allotted.
At press time, the U is working on a more focused video; I'll update this post when it's available.
Have an amazing Friday, weekend, and Martin Luther King Day (again, for those blessed to be living in Canada's undies). All classes will be cancelled at the U until we return on Tuesday, January 16th, 2018.
With love,
Where y'at, phD
Faculty Notes
Happy Friday! I'm gearing up for a trip to London where my children will antagonize both tourists and "keep calm and carry on" locals. We're equal-opportunity like that. But before I hop aboard the National Express, today's post is about the U's early tactical assessments for Dreadnought, the newest map in War Robots.
The community manager at Pixonic told a group of content creators (YouTubers and writers like yours truly) that the most exciting ideas he's seen over the last several months come from their new map designer. I agree! If Moon, Valley, and Dreadnought are the shape of things to come, we know we're going to have very entertaining terrain on which to fight our battles.
A crashed space craft (perhaps a Star Wars-inspired Imperial Star Destroyer) is the distinguishing feature on Dreadnought. Just in case you thought War Robots fans were nerds with a lot of free time, you should see what's on the interwebs about Star Wars. Wow. Who knew the Star Destroyer has a crew of 37,000?!?!
Because much of the ship is navigable on two levels, it’s a new feel for our game. While this battlefield is symmetrical, the beacons are laid out in a "T" instead of the more familiar "X" of Yamantau or Shenzhen. Each team has only one "home" beacon, with three laid out across the midfield line of the map. If you are a footballer (inexplicably, we call this game "soccer" in Canada's underpants), you will probably know what you need to do - when the defense is massed against you, move the action to the far side of the field.

Nothing has changed about our victory conditions - holding three beacons is how you win. We will assume your team is capable of holding its home beacon, because if they can't, there's no need to think about tactics. Dreadnought throws a curve at you, because it isn't usually possible to hold all three "centers." Instead, the magic is in besting your opponent on a constantly shifting seesaw.

It's also like dodge or "battle" ball, as it was called during my nerd-smiting days:
Let's look at the actual map:

Getting down to business, battles on Dreadnought are going to shift sides. A lot. So, we offer some helpful movement hints:
- There is a protected tunnel along the top of the T (ALPHA-BRAVO-ECHO) inside the spacecraft's wing.
- The "roof" offers a path along the center line (BRAVO-CHARLIE-DELTA), plus strong position and cover.
- The debris offers cover on both sides of the map. Use it, because someone will be firing at you from the roof, the far end, or both!
We recommend attacking along the high side of the craft, and then making your subsequent decisions based on your enemy's weakest position along the center line (BRAVO-CHARLIE-DELTA) - go there! In the video below, the pilot wanders all over the place. The center beacons change hands about a hundred times, and our hero doesn't worry about it. He does a lot of damage, which obviously helps, but he's more interested in HeyChee firepower than strategy related to the map. This battle takes all of the ten minutes allotted.
At press time, the U is working on a more focused video; I'll update this post when it's available.
Have an amazing Friday, weekend, and Martin Luther King Day (again, for those blessed to be living in Canada's undies). All classes will be cancelled at the U until we return on Tuesday, January 16th, 2018.
With love,
Where y'at, phD
Faculty Notes
If you read the U's blog, please hit the subscribe button here and at our YouTube channel! We do not (and can not) spam or bother you. You get an email notification when we post new content. Contact us at warrobotsu@gmail.com.
The U is not just a blog ... we are also iOS clans #48669 [theU] for Masters/Champs and #139479 [U-2] for Diamond/Expert. We welcome skilled communicators from around the world.
The U is not just a blog ... we are also iOS clans #48669 [theU] for Masters/Champs and #139479 [U-2] for Diamond/Expert. We welcome skilled communicators from around the world.


I've been playing on this map for over a month...and not in any test scenario, but in the live game.
ReplyDeleteAm I missing something? I'm on Android. Is this a new release for iOS and FB:Gameroom? Because it sounds like you're saying it's just been released. Though maybe by 'newest' you are being literal, and though it has been out and used for a while it's still technically the latest map.
Speaking as someone who has fought dozens of times on this map:
Home beacon for each team will be either of A or E. The quick cappers head here, which leads to an inevitable small arms fight over B. Lots of times I see suicide rushes to cap B, and then it is immediately retaken. Usually the biggest gun wins here, though I have seen successful use of Stalkers.
MOST OF THE TIME, the B cappers then run up the ramp and inside, harassing the knife fighters going for C. I barely ever see anyone doing the long run to A or E...they're too close to the spawn point to keep successfully without MAJOR backup support.
Heavier/slower 'bots meanwhile have been edging toward D, usually engaged in long-range battles with rockets, Trebs etc . with their opposites. Small Cossacks are useless here. The second they jump they are transfixed by multiple Treb/Gekko shots. Stay low, go cover to cover and try for D. Something with a shield to protect against missile bombardment (thinking Carnage here, because of the speed) is ideal.
Once D is capped the long rangers can pick off targets going up the roof, or camp and try to protect D, but their overall damage and kills will go way down. Almost better to pop out of your 'bot and get in there and engage.
Then, going for C are the knife fighters. There is a lot of cover and protection from missiles going from either side towards C, so the knife-fighter 'bots are well suited to getting in and capping C. It also protects them from the long rangers fighting over the D beacon. Many times I will see Griffins trying to go "over the top" to get to C, jumping up and running across the roof and firing down into the hole in the hull. This works to a point...but they'd better hope that the long range fight for D is going in their favour, otherwise they become sniper targets very quickly.
You had proposed most fights would revolve around the A, B, E corridor. That hasn't been my experience. Both A and E are too close to the enemy spawn location for anything but a major push to hold. If you have an organized squad, it is a 3 cap win, but you are surrendering the high ground to your opponent. Not usually a game decider in WR, but the superior angle from the roof of the ship makes much of the debris/cover in the ABE corridor useless.
As the beacon grabber going for B after either A or E (and I can usually win the small arms fight with my Gareth), my usual plan is to start heading up the ramp. Before going over the top, I assess whether there are any reds just spawning, and where they're headed. At this time it is often limited only to the beacon capper I just scrapped. Usually if I head up the ramp, new reds won't aim for B, instead wanting to support the knifefight in the middle, as many hangars include only one beacon runner. Depending on what they do, I'll head to A or E to grab it, with intent to abandon it after it's capped. As you say, it's not worth trying to hold, but it is worth forcing a slow bot to walk over and cap it.
DeleteSometimes I make it out, and sometimes I get bogged down then killed by a red (usually a griffin).